2. Installing Active Directory Rights Management Services
A full installation of AD RMS
can be quite complex. Remember that a single cluster can exist within an
AD DS forest, and make sure you have all the prerequisites in place
before you proceed. Also, because of the AD RMS dependencies, these
prerequisites are comprehensive. During this preparation process, you
decide how to deploy your AD RMS systems. Will you be using only root
cluster members, or will you be dividing tasks between root and
licensing-only clusters? Do you need interaction with outside partners?
Will your deployment be internal only? Answers to each of these
questions will help form the architecture of your AD RMS deployment and
implementation.
After you have all the prerequisites
in place, you can proceed to the actual installation. This is a
multistep operation that requires care and attention.
Note:
MORE INFO AD RMS CLUSTER INSTALLATION INSTRUCTIONS
For more information on the installation of AD RMS clusters, go to http://technet.microsoft.com/en-us/library/cc726041.aspx.
2.1. Preparing AD RMS Installation Prerequisites
There are several prerequisites
to AD RMS installation. If you are setting up only a test environment,
you have few items to consider, but when you are ready to deploy AD RMS
into a production environment, you should take the utmost care to deploy
it correctly. For this reason, endeavor to make your test environment
match the requirements of your production environment to prevent
surprises when you perform the actual deployment.
Warning:
IMPORTANT ADDITIONAL AD RMS INSTALLATION OPTIONS
Note that AD RMS is not
supported and does not run in Server Core installations of Windows
Server 2008 R2. However, AD RMS is a good candidate for virtualization
under Hyper-V, especially in test environments. Keep this in mind when
you plan and prepare your AD RMS deployment.
Begin with the prerequisites. Table 1 outlines the basic requirements for an AD RMS deployment. Table 2 outlines other matters to consider when preparing for AD RMS.
Table 1. RMS System Requirements| HARDWARE/SOFTWARE | REQUIREMENT | RECOMMENDED |
|---|
| Processor | One Pentium, 4.3 GHz or higher | Two Pentium, 4.3 GHz or higher | | RAM | 512 MB | 1024 MB | | Hard disk space | 40 GB | 80 GB | | Operating system | Any Windows Server 2008 R2 edition except Windows Server Web edition and Itanium-based systems | Windows Server Enterprise edition or Windows Server Datacenter edition | | File system | FAT32 or NTFS | NTFS | | Messaging | Message Queuing | | | Web Services | IIS with ASP.NET enabled | |
Table 2. AD RMS Considerations| COMPONENT | CONSIDERATION |
|---|
| Web Server URL | Reserve URLs that will not change and do not include a computer name or use localhost.
Also, use different URLs for internal and external connections. | | Active Directory Domain Services | An AD DS domain running on Windows 2000 SP3, Windows Server 2003, Windows Server 2008, or Windows Server 2008 R2.
Upgrade or run a new AD DS domain on Windows Server 2008 R2 if possible. | | Installation location | AD RMS must be installed in the same domain as its potential users.
If possible, install a multidomain forest and install AD RMS in the child production domain. | | Domain User accounts | Email address configured in AD DS. | | Service account | Standard domain user account that is a member of the local Administrators group.
Domain-based service account that is assigned the Generate Security Audits user right. | | Installation account | A domain-based account.
Must not be on a smart card.
Must have local administrator privileges.
To generate service connection points, must be a member of Enterprise Admins.
To use an external database, must be a member of System Administrators role on the database server. | | Database server | Windows Internal Database or SQL Server 2005 with SP2 or later, including stored procedures to perform operations.
For fault tolerance, use SQL Server 2005 with SP2 or later installed on a separate computer. | | Database instance | Create and name the AD RMS database instance and start the SQL Server Browser service before installation of AD RMS. | | Installation certificate | Obtain an SSL certificate for the AD RMS cluster.
Use self-signed certificates only in testing environments.
Obtain a trusted certificate from an external third-party commercial CA,
and install the certificate prior to the AD RMS installation. | | Cluster key protection | Store the cluster key in the AD
RMS configuration database.
If possible, use a hardware protection device to store the cluster key
and install it on each server before you install the AD RMS role. | | DNS configuration | Create custom CNAME records for the root cluster URL and the database server.
Use separate CNAME records for the AD RMS cluster URL and the database server to protect against system loss. | | Server licensor certificate name | Prepare an official name before you install.
Use an official name, such as the name of your organization. | | AD RMS–enabled client | AD
RMS–enabled browser or application (Word, Microsoft Office Outlook, or
PowerPoint in Office 2010 Enterprise edition, Office 2010 Professional
Plus, or Office 2010 Ultimate edition). | | Smart card usage | Can be integrated in AD RMS but not for setup.
Do not use a smart card for the installation account, or the account will fail. | | Client OS | Windows 7 includes AD RMS client by default; XP requires Windows RMS Client with SP2. |
Tip:
Pay attention to the installation prerequisites in Table 1 as well as the considerations in Table 2. They are complex and, because of this, will certainly appear on the exam.
Note:
AD RMS CLIENT
To obtain the AD RMS client, go to http://support.microsoft.com/kb/917275/pl.
As you can see from Table 1, installing AD RMS in a production environment is not a trivial matter.
Note:
MORE INFO HARDWARE AND SOFTWARE CONSIDERATIONS FOR AD RMS
For more information, see “Pre-installation Information for Active Directory Rights Management Services” at http://technet.microsoft.com/en-us/library/cc771789.aspx.
2.2. Understanding AD RMS Certificates
Because it encrypts and signs
data, AD RMS, like AD CS, relies on certificates and assigns these
certificates to the users in the AD RMS infrastructure. It also uses
licenses that are in an eXtensible rights Markup Language (XrML) format.
Because these licenses are embedded in the content that users create,
they are also a form of certificate. Like AD CS, the AD RMS hierarchy forms a chain of trust that validates the certificate or license when it is used. Table 3 outlines the certificates you require in an AD RMS infrastructure.
Table 3. AD RMS Certificates| CERTIFICATE | CONTENT |
|---|
| Server licensor certificate (SLC) | The SLC
is a self-signed certificate generated during the AD RMS setup of the
first server in a root cluster. Other members of the root cluster share
this SLC. If you create a licensing-only cluster, it will generate its
own SLC and share it with members of its cluster.
The default duration for an SLC is 250 years. | | Rights account certificate (RAC) | RACs
are issued to trusted users who have an email-enabled account in AD DS.
RACs are generated when the user first tries to open rights-protected
content.
Standard RACs identify users in relation to their computers and have a duration of 365 days.
Temporary RACs do not tie the user to a specific computer and are valid for only 15 minutes.
The RAC contains the public key of the user as well as his or her
private key. The private key is encrypted with the computer’s public
key. (See “Machine certificate”, listed later in this table.) | | Client licensor certificate (CLC) | After
the user has a RAC and launches an AD RMS–enabled application, the
application automatically sends a request for a CLC to the AD RMS
cluster. The client computer must be connected for this process to work,
but after the CLC is obtained, the user can apply AD RMS policies even
offline. Because the CLC is tied to the client’s RAC, it is
automatically invalidated if the RAC is revoked.
The CLC includes the client licensor public key, the client licensor
private key that is encrypted by the user’s public key, and the AD RMS
cluster’s public key. The CLC private key is used to encrypt content. | | Machine certificate | The
first time an AD RMS–enabled application is used on a client, a machine
certificate is created. The AD RMS client in Windows automatically
manages this process with the AD RMS cluster. This certificate creates a
lockbox on the computer to correlate the machine certificate with the
user’s profile.
The machine certificate contains the public key for the activated
computer. The private key is contained within the lockbox on the
computer. | | Publishing license | The
publishing license is created when the user saves content in a
rights-protected mode. This license lists which users can use the
content and under which conditions as well as the rights each user has
to the content.
This license includes the symmetric content key for decrypting content
as well as the public key of the cluster. | | Use license | The
use license is assigned to a user who opens rights-protected content.
It is tied to the user’s RAC and lists the access rights the user has to
the content. If the RAC is not available, the user cannot work with
rights-protected content.
The use license contains the symmetric key for decrypting content. This
key is encrypted with the public key of the user. |
Tip:
Pay attention to the different certificates and licenses used in AD RMS. They are good candidates for exam questions.
2.3. Installation Procedure
Now that you understand
the requirements and processes that make up an AD RMS installation, you
are ready to proceed. Ensure that you have prepared all the requirements
listed in Table 1, and then perform the following steps.
Log on to a member server running Windows Server 2008 R2, using Enterprise Administrative credentials. In
production, this server can be running Windows Server 2008 R2 Standard
edition, Windows Server 2008 R2 Enterprise edition, or Windows Server
2008 R2 Datacenter edition.
Warning:
IMPORTANT USE MEMBER SERVERS
Do not install AD RMS on a
domain controller. Use a member server only! With the advent of
virtualization, aside from the operating system licensing aspect, there
is no longer any reason to create multipurpose domain controllers. Each
virtual machine can have its own purpose and run independently of all
other services.
Launch Server Manager from the Administrative Tools program group. Right-click the Roles node in the tree pane and click Add Roles. Review the Before You Begin information and click Next. On the Select Server Roles page, select Active Directory Rights Management Services and click Next. The
Add Role Wizard asks you to add the Web Server (IIS) role with the
required features, Message Queuing and Remote Server Administration
Tools. Click Add Required Role Services if these services were not installed prior to the installation of AD RMS. Click Next. On the Active Directory Rights Management Services page, review the information about the selected role and click Next. On the Select Role Services page, make sure the Active Directory Rights Management Server check box is selected and click Next. Do
not choose the Identity Federation Support option at this time. You
cannot install this option until the AD FS federation relationship has
been created.
On the Create Or Join An AD RMS Cluster page, select Create A New AD RMS Cluster option and click Next. If
the cluster were already created and you were installing a second
server, you would select Join An Existing AD RMS cluster because there
can be only one cluster per forest. On the Select Configuration Database page, select the Use A Different Database Server. If
you choose to use Windows Internal Database to host the AD RMS
databases for a single-server installation, steps 11 and 12 are not
required. Remember that when you use a WID instance, you cannot join
other servers to this cluster. Use WID only in test environments if you
do not have the resources to create a proper database server. Click Select to locate the server that hosts the database, type the server name, and then click Check Names. Click OK. In the Database Instance drop-down list, select the appropriate instance, click Validate, and then click Next. On
the Specify Service Account page, click Specify, type the domain user
account and password that should be used as the AD RMS service account,
click OK, and then click Next. Remember that this account must be a member of the local Administrators group. On the Configure AD RMS Cluster Key Storage page, select Use CSP Key Storage and click Next. You
choose to protect the AD RMS cluster key by using a cryptographic
storage provider because it is a more secure protection method. You must
select the storage provider and then install this certificate on each
new AD RMS server before you can add them to the root cluster. You can
also store the key in the AD RMS database, but doing so is less secure
than with a cryptographic service provider (CSP). On
the Specify AD RMS Cluster Key page, select the CSP to use. You can
select either software or hardware cryptographic service providers. Use
the one that best fits your security policy guidelines, and select
Create A New Key With The Selected CSP. Click Next. You can also use an existing key, but do so only when you are recovering from an unrecoverable configuration database. On
the Select AD RMS Cluster Web Site page, select the website where you
want to install the AD RMS web services and click Next. If you did not
prepare the website before, the name of the website will be Default Web
Site. On the Specify Cluster Address page, select Use An SSL-Encrypted Connection (Https://). As
a security best practice, the AD RMS cluster should be provisioned by
using an SSL-encrypted connection. You should be using a certificate
provided by a third-party commercial certification authority (CA) so
that it can be automatically trusted by all parties. This certificate
should already be installed on the server so that you can select it as
you proceed through the installation. Do
not use an unencrypted connection. You cannot rely on open connections
if you intend to use Identity Federation for your AD RMS implementation. In
the Internal Address section of the Specify Cluster Address page, type
the fully qualified domain name (FQDN) of the AD RMS cluster and click
Validate. If validation succeeds, the wizard updates the preview of the
cluster address at the bottom of the page. Click Next. This
must be a valid FQDN, and it cannot be changed later. If you want to
change the default port on which AD RMS communicates, you can do so on
this page of the wizard. You must do so now, because you will not be
able to change the port at a later date. On
the Choose A Server Authentication Certificate For SSL Encryption page,
select Choose An Existing Certificate For SSL Encryption (Recommended),
select the certificate you installed, and then click Next. If
you did not install the certificate prior to setup, you can click
Import to import the certificate now. You can also use a self-signed
certificate, or, if you did not obtain the certificate prior to
installation, you can select the third option, to choose encryption
later. Note, however, that if you choose this last option, you cannot
complete your installation until you obtain and install this
certificate.
Warning:
IMPORTANT SELF-SIGNED CERTIFICATES
Self-signed certificates
should be used for test environments only. In a production environment,
use a proper SSL certificate issued from a commercial certification
authority.
On the Name The Server Licensor Certificate page, type a valid name to identify the AD RMS cluster and click Next. On the Register AD RMS Service Connection Point page, select Register The AD RMS Service Connection Point Now and click Next. This action registers the AD RMS service connection point (SCP) in the AD DS.
Warning:
IMPORTANT ACCESS RIGHTS FOR SCP CREATION
To register the AD
RMS SCP, you must be logged on to the AD RMS server, using a user
account with write access to the Services container in AD DS—that is, a
member of the Enterprise Admins group.
If
you are preparing the cluster and need to install additional cluster
members before it starts servicing requests, select Register The AD RMS
Service Connection Point Later. Then join the other cluster member and,
when you are ready, create the SCP. On the Web Server (IIS) page, review the information about IIS and click Next. The pages mentioned in steps 23 and 24 are available only if IIS is not preinstalled on the server. On the next page, keep the Web Server default selections and click Next. On the Confirm Installation Selections page, review your choices and click Install. When
the installation is complete, click Close to close the installation
wizard. Log off and log back on to update the permissions granted to the
logged-on user account. The
user account logged on when the AD RMS server role was installed is
automatically made a member of the AD RMS Enterprise Administrators
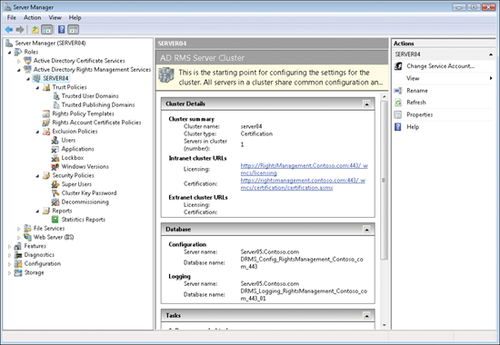
group. This gives this account access to all AD RMS operations. The installation is complete. (See Figure 3.)
Note:
MORE INFO AD RMS CLUSTER
For more information on how to install an AD RMS cluster, see http://technet.microsoft.com/en-us/library/cc726041.aspx. For a step-by-step installation guide, see http://technet.microsoft.com/en-us/library/cc753531(WS.10).aspx.
To provide high availability for the cluster, you must install
additional cluster members. For information on this installation, go to http://technet.microsoft.com/en-us/library/cc753417.aspx.
|